About this Tutorial –
Objectives –
Delegates will learn to use SQL Server 2008 Administration
- SQL Server 2008 Administration
Audience
This course has been designed primarily for programmers new to the .Net development platform. Delegates experience solely in Windows application development or earlier versions of SQL Development will also find the content beneficial.
Prerequisites
Before attending this workshop, students must:
- Be able to manage a solution environment using the Visual Studio 2008 IDE and tools
Contents
Copyright 20/12/12 – David Ringsell
Quick Access
Lab 1: Installing SQL Server
Lab 2: SQL Server Overview
Lab 3: Working with SQL Server Management Studio
Lab 4: Design and Administer Security Levels
Lab 5. Create Indexes
Lab 6: Managing Database and Log Files
Lab 7: Analyzing and Tuning Performance
Lab 8: Automating Administrative Tasks
Lab 9: Programming Replication
Lab 10: Using Integration Services
These labs uses the AdventureWorks and Northwind sample databases. If you do not have these installed, just follow the steps with a database that is installed. Alternatively, you can download and install the databases.
Installing SQL Server 2008 on your PC from an installation DVD.

- Insert the installation DVD in to the drive on your PC.
- Select Hardware and Software Requirements from the Planning tab of SQL Server Installation Centre.
- Select … add features to an existing application from the Installation tab of SQL Server Installation Centre.
- if SQL Server 2008 is already installed on your PC, cancel the installation. Else work through thye steps to install SQL Server 2008.
Explore the SQL Server client and configuration tools.
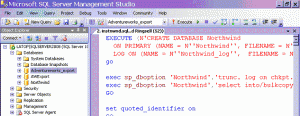
- Launch SQL Server Management Studio from the Start Menu:
Start>All Programs>Microsoft SQL Server 2008> SQL Server Management Studio. - Connect to an instance of the SQL Server Database Engine using Windows Authentication.
- Use the View menu to show the main Management Studio windows:
Object Explorer, Template Explorer, Registered Servers & Solution Explorer. - Use the File>New>Query with Current Connection menu to open a new query window.
- View this script. It createsthe Northwind database. If Northwind is not already installed you can paste this into the query window & run it. The database and its objects will then be created.
- Launch SQL Server Configuration Manager from the Start Menu:
Start>All Programs>Microsoft SQL Server 2008> SQL Server Configuration Tools> Configuration Manager - In Configuration Manager show all the SQL Server services.
- Right-click the SQL Server service. From the Context menu select Stop.
- Right-click the SQL Server service. From the Context menu select Start.
Lab 3: Working with SQL Server Management Studio
Explore the main feature available in Management Studio.
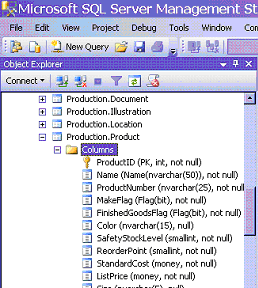
- Launch SQL Server Management Studio from the Start Menu:
Start>All Programs>Microsoft SQL Server 2008> SQL Server Management Studio - Connect to an instance of the SQL Server Database Engine using Windows Authentication.
- In Object Explorer expand:
- Databases>AdventureWorks>Tables>Production.Product>Columns
- Databases>AdventureWorks>Programmability>Stored Procedures
- Databases>AdventureWorks>Security>Users
- Explore the Solution Explorer and Template Explorer windows.
- Right-click the AdventureWorks database. From the Context menu select :
Script Database as>Create To>New Query Editor Window - Explore the Create Database script that has been generated. But do not run it!
- Right-click the AdventureWorks database. From the Context menu select : >Properties.
- Explore the database properties.
- Right-click the server. From the Context menu select : >Properties.
- Explore the server properties.
Lab 4: Design and Administer Security Levels
Add a login and user to SQL Server and use this to secure a database.
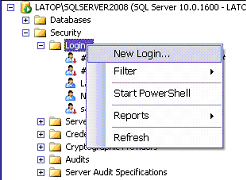
- In Object Explorer expand:
[Server]>Security>Logins - Right-click the Logins folder. From the Context menu select : New Login …
- In the New Login dialog box:
- Enter Login name: Login1.
- Select the SQL Server authentication radio button.
- Enter and confirm a password.
- Remove the tick from the Enforce password policy check box.
- Select AdventureWorks as the default database.
- Click OK to create the login.
- In Object Explorer expand:
[Server]>Databases>AdventureWorks>Security>Users - Right-click the Users folder. From the Context menu select : New Users …In the New User dialog box:
Enter User name: User1 - Link this new user to the login you have just created:
- Click the ellipses button […] in the New User dialog box.
- Click the Browse button.
- Select Login1 from the Browse for Objects dialog box.
- Assign permissions to the new user:
- Select the Securables page in the New User dialog box.
- Click the Search button.
- Click the All object of type radio button.
- Select the Tables check box.
- Select several tables and as appropriate assign permissions to User1.
- Click OK to create the user.
- Confirm the user has been created and check its properties.
Create indexes on the Northwind database.
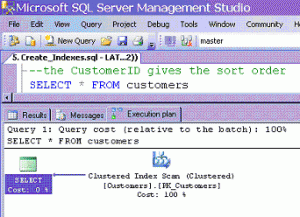
- In Management Studio Use the File>New>Query with Current Connection menu to open a new query window.
- Show the execution plan for queries by selecting the
Query>Include Actual Execution Plan menu - View this script. It includes SELECT queries on the Northwind database. Paste this into the query window & run the first three SELECT statements only .
- Now run only this script to create an index on the Contact table.
CREATE UNIQUE NONCLUSTERED INDEX Contact

ON customers(city, companyname, contactname, country, phone) - Now run the remaining two SELECT queries to test the index. Compare the performance of the queries by looking at their execution plans.Has the index made a difference.
Lab 6: Managing Database and Log Files
Shrink the Northwind database and log files.
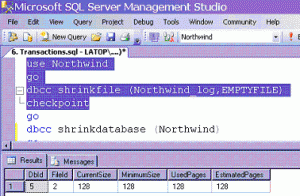
- In Management Studio create a new query.
- Write this script:
use Northwind

go

dbcc shrinkfile (Northwind_log,EMPTYFILE)

checkpoint

go

dbcc shrinkdatabase (Northwind) - Run and save this script.
- View script file.
Lab 7. Analyzing and Tuning Performance
Exercise 1.
Analyze the cost of executing a query using its Estimated Execution Plan.
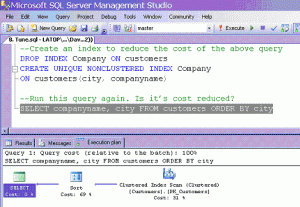
- Open a new query window in Management Studio
- Write and run various queries that return a result sets from the Customers table in the Northwind database. For example:
SELECT * FROM customers

SELECT companyname, city FROM customers ORDER BY city

SELECT companyname, contactname FROM customers ORDER BY city - View the cost of these queries by selecting >Include Actual Execution Plan from the Query menu. Run various queries again.
- Run this query again and view its execution plan:
SELECT companyname, city FROM customers ORDER BY city - Create an index to reduce the cost of the query. For example:
CREATE UNIQUE NONCLUSTERED INDEX Company

ON customers(city, companyname) - Run this query again. Is it’s cost reduced? Will other indexes reduce the cost more?
- Save the script, but leave the query window open.
- View script file.
Exercise 2.
Measure the performance of a query using SQL Profiler.
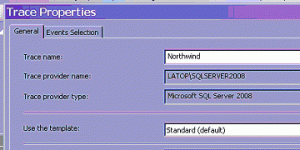
- Launch SQL Profiler from Management Studio using the Tools>SQL Profiler menu.
- Connect to an instance of the SQL Server Database Engine.
- In the Trace Properties dialog box enter Northwind as the Trace Name.
- Tick the Save to file check box. Enter NorthwindTrace for the File Name & save the file to your PC’s Desktop.
- Select the Event Selection tab in SQL Profiler. Tick the Show all events check box.
- Expand the TSQL row, then tick these events:
- SQL:StmtStarting
- SQL:StmtCompleted
- Start SQL Profiler by clicking the Run button.
- Execute the script from Exercise 1 from Management Studio.
- In the trace of the scripts execution, look at the Duration column. How long have the statements taken to complete?
- Create indexes for the queries in the script. The aim is to reduce the duration time of the queries.
- Stop the trace and close SQL Profiler.
Lab 8: Automating Administrative Tasks
Create a maintenance plan to shrink and back up the Northwind database.
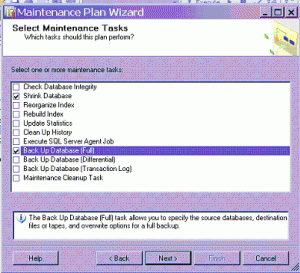
- To launch the Maintenance Plan Wizard from Object Explorer in Management Studio, right-click the Management>Maintenance Plan folder.
- From the Context menu select :
Maintenance Plan Wizard - Click Next on the Wizard’s first step.
- Enter the name Shrink and Backup, then provide a description on the wizards next step.
- Click the Change button to schedule the maintenance. Plan the maintenance tasks to occur daily at midnight.
- Select the Northwind database on the Wizard’s next step.
- Select Shrink Database and Back Up Database(Full) on the Wizard’s next step.
- Work through the remaining wizard steps to complete the maintenance plan for the Northwind database.
Lab 9: Programming Replication
Create a replication publication and subscription in Management Studio.
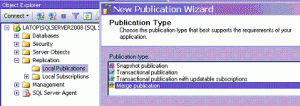
- Configure replication in Management Studio’s Object Explorer, by right-clicking the Replication folder.
- Create a new local publication in Object Explorer, by right-clicking the Replication folder.
- Use the New Publication Wizard to create a Merge publication on the Adventure Works database. Select several tables to include in the publication’s article. But you do not need to filter table rows.
- Enter Publication name AWPublication. Finish the wizard.
- Create a new local subscription to the publication, AWPublication, you have just created, again by right-clicking the Replication folder. Use the New Subscription Wizard.
- Create a new subscription database called, AWSubscribe, using the wizard.
- Run the subscription under the SQL Server Agent service account. Create the subscription by finishing the wizard.
- Explore other options for creating publications and subscriptions in Object Explorer.
Lab 10: Using Integration Services
Use Import & Export Wizard to copy data between databases.
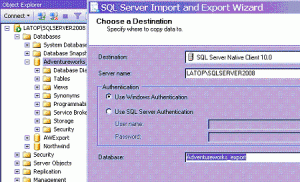
- Launch the Import & Export Wizard from Management Studio’s Object Explorer, by right-clicking the Adventure Works database, then select the Tasks>Export Data context menu options.
- Use the wizard to export selected tables to a new database you create on the same server.
- Click on the Edit Mappings button in the wizard. This allows column properties to be changed when data is moved from the source to the destination tables.
- Look at the new database you have just created to confirm that it contains the exported tables.
- Experiment with using the Import and Export Wizard to move data to databases. Try, for example, importing an Excel spreadsheet in to a database.


If you would like to see more content like this in the future, please fill-in our quick survey.