About this Tutorial –
Objectives –
Delegates will learn to develop applications using JavaScript After completing this course, delegates will be able to:
- Use Visual Studio 2012 effectively
- Creating an JavaScript Application
Audience
This course has been designed primarily for programmers new to the .Net development platform. Delegates experience solely in Windows application development or earlier versions of ASP.Net will also find the content beneficial.
Prerequisites
Before attending this workshop, students must:
- Be able to manage a solution environment using the Visual Studio 2012 IDE and tools
- Be able to program an application using JavaScript
Contents
Copyright 20/12/12 – David Ringsell
Quick Access
Exercise 1:Add a JavaScript Alert
Exercise 2:Add and Call a JavaScript Function
Exercise 3:Add and Call a JavaScript Function with Parameters
Exercise 4:Create Popup Windows
Exercise 5:External JavaScript
Exercise 6:Working with Arrays
Exercise 7:Working with Strings
Exercise 8:Working with Objects
Exercise 9:Use Conditional Statements
Exercise 10: Use Switch Statements
Exercise 11: DOM Manipulation
Exercise 12: Sum Three Numbers
Exercise 1 Add a JavaScript Alert
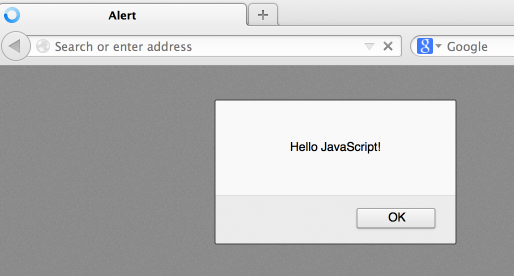
We will start by just showing a pop-up window. This will be visible as soon as the page loads. We do this with the JavaScript alert() function.
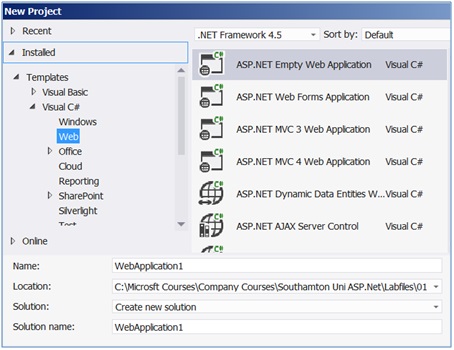
- In Visual Studio, use the File>New Project menu, to create a C# ASP.Net Empty Web Application Project
- Add a new HTML page called Alert.html to the project. Do this by right-clicking the project name in Solution Explorer and using the context menu. Select Add>New Item … from the context menu. Set this HTML page as the start page, by again using the context menu.
- Replace the content of Alert.html with the HTML tags and JavaScript below.
- Test the project by building and executing it. Does the page appear in a browser?
- Stop the application by selecting the Debug>Stop Debugging menu.
<!DOCTYPE html>
<html xmlns=”http://www.w3.org/1999/xhtml”>
<title>Alert</title>
<body>
<script type=”text/javascript”>
alert(‘Hello JavaScript!’);
<script/>
</body>
</html> - View Code
Exercise 2 Add and Call a JavaScript Function
We will next create our own function to show a message. This will be called when we click a button. The message is passed as a parameter to the function.
- Add a new HTML page called Function.html to the project you created in Exercise 1. Do this by right-clicking the project name in Solution Explorer and using the context menu. Set this HTML page as the start page by again using the context menu.
- Replace the content of Function.html with the HTML tags and JavaScript below.
- Test the project by building and executing it. Does the alert appear when the button is clicked?
<!DOCTYPE html>
<html xmlns=”http://www.w3.org/1999/xhtml”>
<head>
<title>Function</title>
<script type=”text/javascript”>
function test(message) {
alert(message);
}
</script>
</head>
<body>
<input type=”button” onclick=”test(‘clicked!’)” value=”Call
JavaScriptfunction” />
</body>
</html> - View Code
Exercise 3 Add and Call a JavaScript Functions with Parameters
We will create two functions; the first takes three parameters, the second can take any number of parameters. Each function will be called by clicking a button.
- Add a new HTML page to the project you created in Exercise 1. Do this by right-clicking the project name in Solution Explorer and using the context menu. Set this HTML page as the start page by again using the context menu.
- Add an external JavaScript file containing a function called sample(). This function will display an alert() pop-up. To do this, right-click the Project in Solution Explorer and select Add New Item … from the context menu.
- Replace the content of the page with the HTML tags and JavaScript below.
- Test the project by building and executing it. Is the correct sum calculated?
<!DOCTYPE html>
<html xmlns=”http://www.w3.org/1999/xhtml”>
<head>
<title>Function Parameters</title>
<script type=”text/javascript”>
//Declare function with parameters
//and return value
function average(a, b, c) {
var total;
total = a + b + c;
return total / 3;
}//Declare function that uses
//parameters via the arguments array
function sum() {
var sum = 0;
for (var i = 0; i < arguments.length; i++)
sum += parseInt(arguments[i]);
return sum;
}
</script>
</head>
<body>
<!–Call functions–>
<input type=”button” onclick=”alert(average(1, 2, 3));”value=”Call
Function With 3 Parameters” />
<br />
<input type=”button” onclick=”alert(sum(1, 2, 4, 5));” value=”Call
Function With Variable Parameters” />
</body>
</html>Click on the button, , “Call Function With 3 Parameters”, that calls the function “average” to calculate the average of 1, 2 and 3:
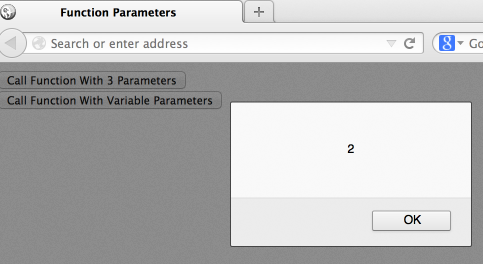
Click on the button, “Call Function With 3 Parameters”, that calls the function “sum” to calculate the sum of 1, 2, 4 and 5:

- View Code
Exercise 4 Create Popup Windows
We will show three kinds of pop-up window. They will be visible as soon as the page loads. Messages are passed to the pop-ups as parameters. Pop-up are a good way creating a dialogue with the user.
- Add a new HTML page to the project you created in Exercise 1. Do this by right-clicking the project name in Solution Explorer and using the context menu. Set this HTML page as the start page by again using the context menu.
- Replace the content of the page with the HTML tags and JavaScript below.
- Test the project by building and executing it. Does the alert appear when the button is clicked?
<!DOCTYPE html>
<html xmlns=”http://www.w3.org/1999/xhtml”>
<head>
<title>Popups</title>
</head>
<body>
<script type=”text/javascript”>
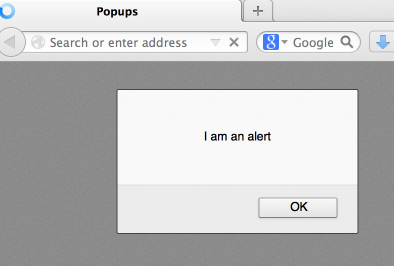
//Alert box with text and [OK] button
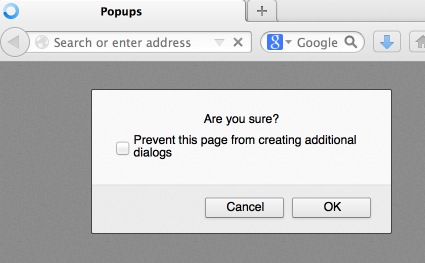
alert(“I am an alert”); //Confirmation box
confirm(“Are you sure?”);//Prompt box
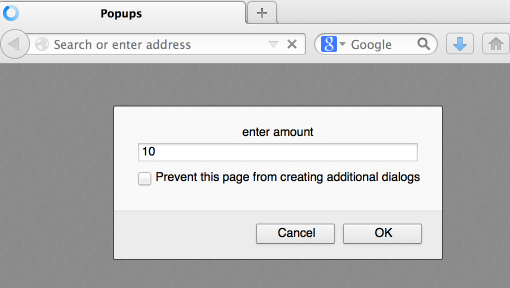
prompt(“enter amount”, 10);
</script>
</body>
</html>Alert popup:
Confirmation popup:
Prompt popup:
- View Code
Exercise 5 External JavaScript
So far JavaScript has been included in our individual web pages. Now we will put this in an seperate file. The benefit of this is the JavaScript will be available to all the pages of the application.
- Add a new HTML page to the project you created in Exercise 1. Do this by right-clicking the project name in Solution Explorer and using the context menu. Set this HTML page as the start page by again using the context menu.
- Add an external JavaScript file called sample.js, containing a function called sample(). This function will display an alert() pop-up. To do this, right-click the Project in Solution Explorer and select Add New Item … from the context menu.
- Replace the content of sample.js with the script below.
function sample()
{
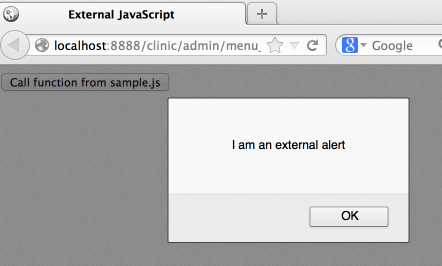
alert(‘I am an external alert’)
} - Replace the content of the HTML page with the tags and JavaScript below.
- Test the project by building and executing it. Does the alert appear when the button is clicked?
<!DOCTYPE html>
<html xmlns=”http://www.w3.org/1999/xhtml”>
<head>
<title>External JavaScript</title>
<!–JavaScript function is in external file–>
<script src=”sample.js” type=”text/javascript”>
</script></head>
<body>
<input type=”button” onclick=”sample()” value=”Call
function from sample.js” />
</body>
</html> - View Code
Exercise 6 Working with Arrays
Arrays are just groups of related values. They are often more effective than working with lots of separate variables. Once an array is declared it can easily be populated with values, for example strings or numbers. The array has methods to work with the values contained in it. We will create an array of numbers.
- Add a new HTML page to the project you created in Exercise 1. Do this by right-clicking the project name in Solution Explorer and using the context menu. Set this HTML page as the start page by again using the context menu.
- Replace the content of the page with the HTML tags and JavaScript below.
- Test the project by building and executing it. Does the alert appear when the button is clicked?
<!DOCTYPE html>
<html xmlns=”http://www.w3.org/1999/xhtml”>
<head>
<title>Arrays</title>
</head>
<body>
<script type=”text/javascript”> //Declaring new empty array:
var arr = new Array();//Declaring and populating elements
var arr = [1, 2, 3, 4, 5];//Appending an element to the array
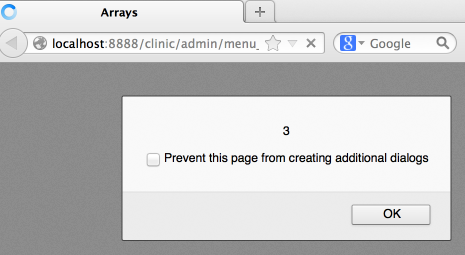
alert(arr.push(3));//Getting the last element
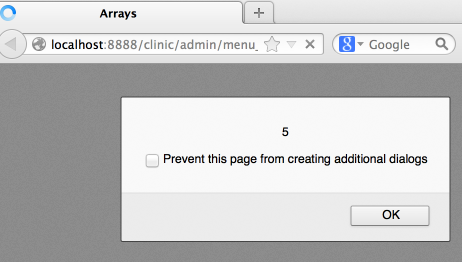
alert(arr.pop());//Reading the number of elements
alert(arr.length);</script>
</body>
</html>Pushing an element to the array:

- View Code
Exercise 7 Working with Strings
String variables hold any sort of text, for example characters entered in a text box. Strings can be worked with in many ways; strings can be joined, or numbers converted to strings. We will create and work with two string variables.
- Add a new HTML page to the project you created in Exercise 1. Do this by right-clicking the project name in Solution Explorer and using the context menu. Set this HTML page as the start page by again using the context menu.
- Replace the content of the page with the HTML tags and JavaScript below.
- Test the project by building and executing it. Does the alert appear when the button is clicked?
<!DOCTYPE html>
<html xmlns=”http://www.w3.org/1999/xhtml”>
<head>
<title>Strings</title>
</head>
<body>
<script type=”text/javascript”>
string1 = “JavaScript “;
string2 = “Tutorial”; //The + operator joins strings
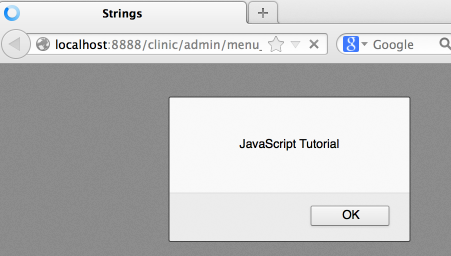
alert(string1 + string2); // JavaScript Tutorial
//Converting number to a string
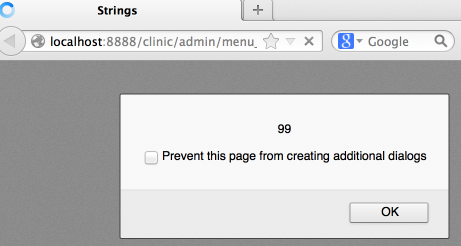
alert(“9” + 9); // 77//Converting string to a number
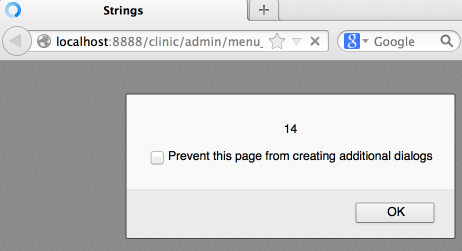
alert(parseInt(“7”) + 7); // 18</script>
</body>
</html> - View Code
Exercise 8 Working with Objects
String and array variables are seen as objects in JavaScript. Objects have lots of useful functions, known as methods. These allow the variables to be manipulated in many ways. We will create and work with string and array variables.
- Add a new HTML page to the project you created in Exercise 1. Do this by right-clicking the project name in Solution Explorer and using the context menu. Set this HTML page as the start page by again using the context menu.
- Replace the content of the page with the HTML tags and JavaScript below.
- Test the project by building and executing it. Does the alert appear when the button is clicked?
<!DOCTYPE html>
<html xmlns=”http://www.w3.org/1999/xhtml”>
<head>
<title>Objects</title>
</head>
<body>
<!– Every variable can be considered as an object
For example strings and arrays have member functions–>
<script type=”text/javascript”>
var test = “JavaScript Tutorial”;
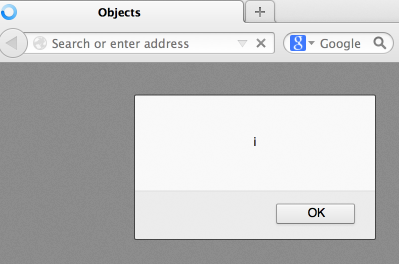
alert(test[7]); // shows letter ‘i’
alert(test.charAt(5)); // shows letter ‘c’
alert(“string”.charAt(1)); //shows letter ‘t’
alert(“string”.substring(1, 3)); //shows ‘tr’
var arr = [1,3,4];
alert (arr.length); // shows 3
arr.push(7); // appends 7 to end of array
alert (arr[3]); // shows 7
</script>
</body>
</html> - View Code
Exercise 9 Use Conditional Statements
A conditional statement will first test a variable and then decide what to do, depending on the result. If test is true, one action is taken, else another action is taken. Tests on variables can be combined using the logical AND operator & the logical OR operator. We will create number and Boolean variables, and then test these.
- Add a new HTML page to the project you created in Exercise 1. Do this by right-clicking the project name in Solution Explorer and using the context menu. Set this HTML page as the start page by again using the context menu.
- Replace the content of the page with the HTML tags and JavaScript below.
- Test the project by building and executing it. Does the alert appear when the button is clicked?
<!DOCTYPE html>
<html xmlns=”http://www.w3.org/1999/xhtml”>
<head>
<title>Conditional Statements</title>
</head>
<body>
<script type=”text/javascript”>
var a = 0;
var b = true;
//The condition may be of Boolean or integer type
//The OR operator: ||
if (typeof (a) == “undefined” || typeof (b) == “undefined”)
{
// Run only if condition is true
document.write(“Variable a or b is undefined.”);
}
//The AND operator: &&
else if (!a && b)
{
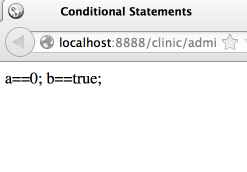
document.write(“a==0; b==true;”);
} else {
document.write(“a==” + a + “; b==” + b + “;”);
}
</script>
</body>
</html> - View Code
Exercise 10 Use Switch Statements
A Switch will also test a variable and then decide what to do depending on the result. But a Switch statement can define actions for many of the possible values in the variable. If the variable contains none of these values, we can also define a default action. We will create and test a date variable.
- Add a new HTML page to the project you created in Exercise 1. Do this by right-clicking the project name in Solution Explorer and using the context menu. Set this HTML page as the start page by again using the context menu.
- Replace the content of the page with the HTML tags and JavaScript below.
- Test the project by building and executing it. Does the alert appear when the button is clicked?
<!DOCTYPE html>
<html xmlns=”http://www.w3.org/1999/xhtml”>
<head>
<title>Switch Statement</title>
</head>
<body>
<script type=”text/javascript”>
var day = new Date().getDay();
//The switch runs statement
//depending on a variable
switch (day)
{
case 6:
document.write(“Today it’s Saturday”);
break;
case 0:
document.write(“Today it’s Sunday”);
break;
default:
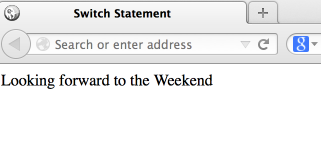
document.write(“Looking forward to the Weekend”);
}
</script>
</body>
</html> - View Code
Exercise 11 DOM Manipulation
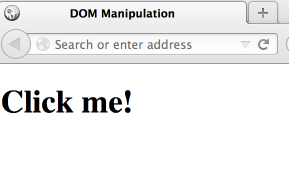
The really clever thing about JavaScript is it can find, and then change any part of a web page. So the page can become really responsive to its user. It does this by working with the page’s DOM, or Document Object Model. The DOM is just a way of seeing the page as a set of structured objects. We will locate an <h1> element by its Id, and then display its content.
- Add a new HTML page to the project you created in Exercise 1. Do this by right-clicking the project name in Solution Explorer and using the context menu. Set this HTML page as the start page by again using the context menu.
- Replace the content of the page with the HTML tags and JavaScript below.
- Test the project by building and executing it. Does the alert appear when the button is clicked?
<!DOCTYPE html>
<html xmlns=”http://www.w3.org/1999/xhtml”>
<head>
<title>DOM Manipulation</title>
<script type=”text/javascript”>
function getValue()
{
//Show innerHTML of an element with a specific ID
var x = document.getElementById(“Header”);
alert(x.innerHTML);
}
</script>
</head>
<body>
<!–When text clicked call function–>
<h1 id=”Header” onclick=”getValue()”>Click me!</h1>
</body>
</html> - View Code
Exercise 12 Sum Three Numbers
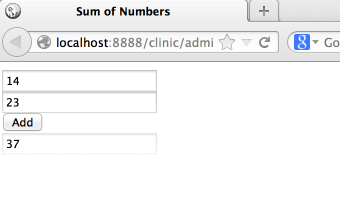
We’ll end with creating a JavaScript function to add two numbers. We’ll use the DOM again to work with parts of the page. This time we’ll get the numbers entered in two textboxes, and then show their sum in another textbox.
- Add a new HTML page to the project you created in Exercise 1. Do this by right-clicking the project name in Solution Explorer and using the context menu. Set this HTML page as the start page by again using the context menu.
- Replace the content of the page with the HTML tags and JavaScript below.
- Test the project by building and executing it. Is the correct sum calculated?
<!DOCTYPE html>
<html xmlns=”http://www.w3.org/1999/xhtml”><head>
<title>Sum of Numbers</title>
<script type=”text/javascript”>
function calcSum() {
value1 =
parseInt(document.mainForm.textBox1.value);
value2 =
parseInt(document.mainForm.textBox2.value);
sum = value1 + value2;
document.mainForm.textBoxSum.value = sum;
}
</script>
</head>
<body>
<form name=”mainForm”>
<input type=”text” name=”textBox1″ /> <br/>
<input type=”text” name=”textBox2″ /> <br/>
<input type=”button” value=”Add” onclick=”calcSum()” /><br/>
<input type=”text” name=”textBoxSum” readonly=”readonly”/><br/>
</form>
</body>
</html> - View Code


If you would like to see more content like this in the future, please fill-in our quick survey.