10. Video and Audio

About this Tutorial

Objectives

Delegates will learn to develop applications using HTML5/CSS3 and JS. After completing this course, delegates will be able to:

  • Use Visual Studio 2012 effectively
  • Create commercial HTML5 Web Applications
  • Develop Websites that may use web sockets, animations and geolocation

Audience

This course has been designed primarily for programmers new to the .Net development platform. Delegates experience solely in Windows application development or earlier versions of HTML/CSS and JavaScript will also find the content beneficial.

Prerequisites

No previous experience in web programming is required. But any experience you do have in programming will help. Also no experience in browser IDE’s is required. But again any experience you do have with programming development environments will be a valuable.

Download Solutions

HTML tutorial

Quick Access


Overview

Estimated Time – 1 Hour

Not what you are looking? Try the next tutorial – Graphics with Svg

  1. Video
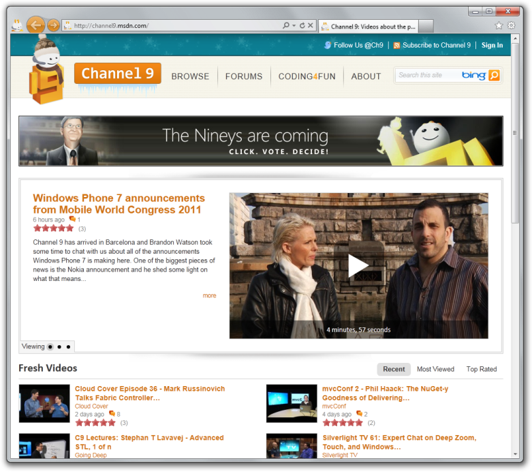
    • The HTML5 <video> element
      provides native support for videos

      • No need for plug-ins
        T10P1 video
    • Videos can be composited
      with anything else on the page

      • HTML content, images, canvases, SVG
    • Ideally you should support the following video formats on your web site:
      • WebM
      • MP4
      • OGV
  2. Audio
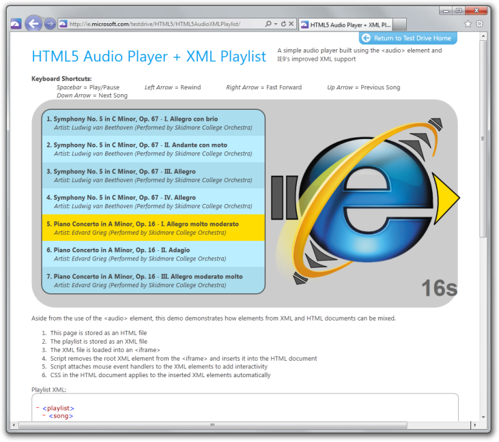
    • The HTML5 <audio> element
      provides native support for audios

      • No need for plug-ins
    • Audios are fully scriptable
    • The current specification does not specify which audio formats browsers should support
      T10P2 video

Lab 1: Playing video

Lab 1: Playing video
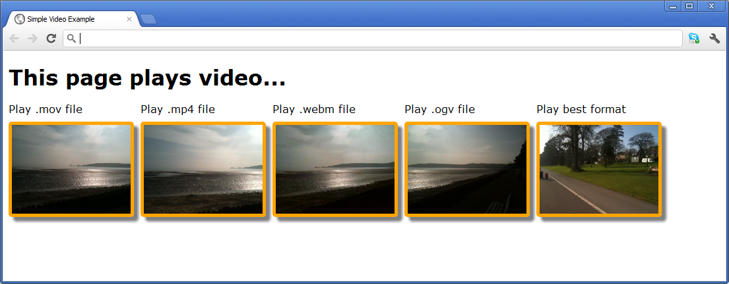
  1. Using the <video> Tag
    • See Video/PlayVideo.html – Firstly the style
    • View code file.
    • <style>
       video {
        width: 180px;
        height: 135px;
        ...
       }
      </style>

    • Then the content
      <h1>This page plays video...</h1>
      <video src="MyVideos/SwanseaBay.mov" poster="ImageLoading.png"
          autoplay loop controls></video>
      ...
      <video poster="ImageLoading.png" controls>
       <source src="MyVideos/SwanseaBay.mp4" type='video/mp4' />
       <source src="MyVideos/SwanseaBay.webm" type='video/webm' />
       <source src="MyVideos/SwanseaBay.ogv" type='video/ogg' />
       <!-- You can embed Flash or Silverlight content here, as a fallback -->
       <!-- Display some text in case the browser doesn't support the video tag -->
       Can't play video. Download video <a href="MyVideos/SwanseaBay.webm">here</a>.
      </video>

      T10P3 video
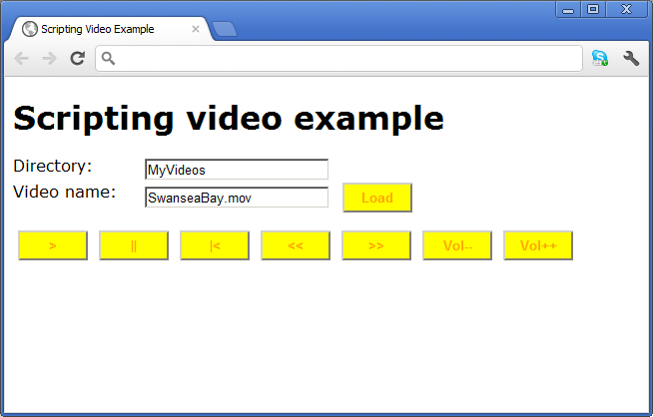
  2. Scripting Video
    • The <video> element has events, methods and properties that you can access in JavaScript – See Video/ScriptVideo.html
    • View code file.
    • var newVideo = document.createElement("video");
      newVideo.src = videoDirElem.value + "/" + videoNameElem.value;
      newVideo.loop = true;
      newVideo.autoplay = true;
      newVideo.controls = true;
      newVideo.poster = "ImageLoading.png";
      ...
      aVideo.play();
      aVideo.pause();
      ...
      aVideo.currentTime = 0;
      aVideo.playbackRate = 3;
      aVideo.volume += 0.25;

      T10P4

  3. Detecting Browser Capabilities
    • You can detect whether the browser supports <video>
      try
      {
       var v = document.createElement("video");
       
       if (v && v.canPlayType &&
         v.canPlayType("video/mp4").match(/^(probably|maybe)$/i))
       {
        // Browser can likely play MPEG-4 video
       }
       else
       {
        // Browser cannot play MPEG-4 video
       }
      }
      catch (e)
      {
       // Exception when testing for MPEG-4 Playback
      }
Lab
  1. In this lab, you’ll implement a web page that displays a video and plays an audio clip. You will be working from the initial folder with all the finished work in the final folder for your referral if you need help; both of which can be downloaded from the top of the tutorial
  2. Familiarization – Open Internet Explorer and browse to VideoPlayer.html in the final folder. The web page has a video player, but you have to hover over it before it plays. When you hover over the video player, the following things happen:
  3. View code file.
    • A short audio blip is played.
    • The video starts playing.
    • The shape of the video player mutates.
    • A reflection of the video fades into view beneath the video player.
  4. Now move the mouse off the video player. The following things happen:
    • The video stops playing.
    • The shape of the video player returns to its original rectangular state.
    • The reflection of the video fades out of view beneath the video player.
  5. Displaying a Video – In File Explorer, go to the Student folder and open VideoPlayer.html in the text editor. Where indicated by the TODO 1 comment, add a <video> element to play the video in the videos sub-folder.
  6. View code file.
    • Make sure the <video> element supports all the available video formats.
      <source src="videos/SwanseaBay.mp4" type='video/mp4' />
      <source src="videos/SwanseaBay.webm" type='video/webm' />
      <source src="videos/SwanseaBay.ogg" type='video/ogg' />
      Can't play video. Download video <a href="videos/SwanseaBay.webm">here</a>.
    • Configure the <video> element to display the provided poster image during loading, and for the <video> element to automatically preload.
      <video id="myVideo" poster="ImageLoading.png" preload="auto">
    • Also configure the <video> element to show the controls, to start automatically, and to loop indefinitely:
      <video id="myVideo" poster="ImageLoading.png" preload="auto" controls autoplay loop>
  7. Open the initial web page in Internet Explorer. Verify the video starts playing immediately. When you hover over the video player, it should automatically change shape (due to a :hover CSS rule in the style sheet). Likewise, when you move the mouse away from the video player, it should become rectangular again.
  8. Controlling Video Playback
    • Modify the <video> element in VideoPlayer.html so that the video doesn’t start automatically.
    • View code file.
    • <video id="myVideo" poster="ImageLoading.png" preload="auto" controls loop>

    • Now open VideoPlayer.js in the text editor and take a look at the existing code. Don’t worry too much about the translate() and scale() functions.
    • View code file.
    • Add code so that the web page only plays the video while the mouse is hovering over the video player, as indicated by the TODO comments:
      • TODO 2a: Get the <video> element and store it in myVideo.
        var myVideo = document.getElementById('myVideo');
      • TODO 2b: Handle the mouseenter event for the video. When this occurs, play the video and fade-in the reflection canvas (use the Jquery fadeIn() function).
          myVideo.addEventListener('mouseenter',
                       function () {
                         myVideo.play();
                         $('#reflectionCanvas').fadeIn(1000);
                       },
                       false);
      • TODO 2c: Handle the mouseleave event for the video. When this occurs, pause the video and fade-out the reflection canvas (use the fadeOut() function).
          myVideo.addEventListener('mouseleave',
                       function () {
                         myVideo.pause();
                         $('#reflectionCanvas').fadeOut();
                       },
                       false);
      • TODO 2d:Handle the canplay event for the video. This event occurs when the video becomes playable. When this occurs, set up a JavaScript interval (e.g. every 20ms) to copy the current video frame into the reflection canvas.
        • Hint 1: To display the current video frame in the canvas, call the context.drawImage() method. Pass in 5 parameters, i.e. the video object followed by the left, top, width, and height values for the canvas.
          context.drawImage(myVideo, 0, 0, canvas.width, canvas.height);
        • Hint 2: To apply the opaque-to-transparent gradient to the canvas, call the context.fillRect() method. Pass in 4 parameters, i.e. the left, top, width, and height values for the canvas.
          context.fillRect(0, 0, canvas.width, canvas.height);
        • Overall it should look similar to this in its functionality
            myVideo.addEventListener('canplay', function () {
              setInterval(function () {
                context.drawImage(myVideo, 0, 0, canvas.width, canvas.height); // Draw the current video frame in the canvas.
                context.fillRect(0, 0, canvas.width, canvas.height);      // Draw the fade effect.
              }, 20);
            }, false);
    • Refresh the initial web page in Internet Explorer. Verify the video only plays while the mouse hovers over the video player. Also verify the reflection canvas fades in and out accordingly.

Lab 2: Playing audio

Lab 2: Playing audio
  1. Using the <audio> Tag
    • See Audio/PlayAudio.html
    • View code file.
    • <style>
       audio {
        margin-top: 10px;
        background-color: red;
       }
       ...
      </style>
      ...
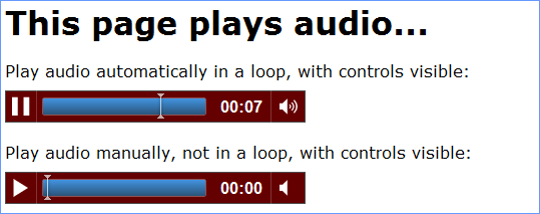
      <h1>This page plays audio...</h1>
      Play audio automatically in a loop, with controls visible:<br/>
      <audio src="MyAudios/Beat.mp3" autoplay loop controls></audio> <br/><br/>
      Play audio manually, not in a loop, with controls visible:<br/>
      <audio src="MyAudios/Beat.mp3" controls></audio> <br/><br/>

      T10P5

  2. Scripting Audio
    • <audio> has events, methods and properties that you can access in JavaScript – See Audio/ScriptAudio.html
    • View code file.
    • var audio = document.createElement("audio");
      audio.addEventListener('ended', function () {
       doPlay();
      }, false);
      function doPlay() {
       audio.src = anAudioFile;
       audio.play();
      }
      function doPause() {
       audio.pause();
      }

      T10P6

  3. Detecting Browser Capabilities
    • You can detect whether the browser supports <audio>
      var audio = document.createElement("audio");
       
      if (audio && audio.canPlayType &&
        audio.canPlayType("audio/mp3"))
      {
       // Browser can play MP3 audio.
      }
      else
      {
       // Browser cannot play MP3 audio.
      }
Lab
  1. Playing an Audio Clip – In this exercise, you’ll refactor the web page so that it plays a short audio clip just before it starts playing the video.
  2. In VideoPlayer.html, where indicated by the TODO 3 comment, add an <audio> element to play the audio clip in the audios sub-folder.
  3. View code file.
    • Make sure the <audio> element supports all the available audio formats.
      <source src='audios/Blip.ogg' type='audio/ogg'>
      <source src='audios/Blip.mp3' type='audio/mp3'>
    • Configure the <audio> element to automatically preload.
      <audio id="myAudio" preload="auto">
    • Do NOT configure the <audio> element to show the controls, to start automatically, or to loop indefinitely
      <audio id="myAudio" preload="auto">
  4. In VideoPlayer.js, refactor the code as follows:
  5. View code file.
    • When the mouse hovers over the video player, DO NOT play the video or fade-in the reflection canvas. Instead, just play the audio clip.
        myVideo.addEventListener('mouseenter',
                     function () {
                       myAudio.play();
                     },
                     false);
    • When the audio clip has ended, now is the time to play the video and fade-in the reflection canvas.
        myAudio.addEventListener('ended',
                     function () {
                       myVideo.play();
                       $('#reflectionCanvas').fadeIn(1000);
                     },
                     false);
  6. Refresh the initial web page in Internet Explorer. Verify the audio clip plays when the mouse enters the video player. Ensure the video only starts playing after the audio has finished (you might like to experiment with the audio playbackRate property to affect the audio playback speed, to see what effect it has.


Well done. You have completed the tutorial in the HTML5/CSS3/JS course. The next tutorial is

11. Graphics with Svg


Back to beginning
Copyright © 2016 TalkIT®


If you liked this post, please comment with your suggestions to help others.
If you would like to see more content like this in the future, please fill-in our quick survey.
Scroll to Top