In this tutorial you will learn more core C# and look at object initialization and anonymous types. This will allow you to write a simple C# program that you will then compile. The program will be a Visual Studio Form application
About this Tutorial
Objectives
Delegates will learn to develop applications using C# 4.5. After completing this course, delegates will be able to:
Use Visual Studio 2012 effectively
Create commercial C# Web Applications
Develop multi-threaded applications, Use WCF and LINQ
Audience
This course has been designed primarily for programmers new to the .Net development platform. Delegates experience solely in Windows application development or earlier versions of C# will also find the content beneficial.
Prerequisites
No previous experience in C# programming is required. But any experience you do have in programming will help. Also no experience in Visual Studio is required. But again any experience you do have with programming development environments will be a valuable.
Experience using a contemporary OO language such as C++ or C# would be useful but is not required.
Overview
Object initializers let you assign values of an object when you are creating them without the need to invoke a constructor with assignment statements after this. The object initializer syntax allows you to choose what arguments you send in for an object. Anonymous types enable the select clause in a LINQ query expression to transform objects of the original sequence into objects whose value and shape may differ from the original. This is useful if you want to store only a part of the information from each object in a sequence.
Estimated Time – 1 Hour
Not what you are looking? Try the next tutorial – LINQ to Objects
Lab 1: Object and Collection Initialization
Lab 1: Object and Collection Initialization
Object initialization Syntax:
You can initialize an object’s properties directly, during object creation:
Create object using new, as usual.
Optionally pass parameters into a constructor.
Then use {} to enclose property=value expressions, separated by commas.
Popular technique amongst C# developers:
Obviates the need for multiple constructors.
Client code can just set the properties it wants to.
Collection Initialization Syntax:
You can initialize a collection directly, during collection creation:
Similar idea to object initialization syntax.
Create collection using new, as usual.
Then use {} to enclose collection items.
Populartechnique amongst C# developers:
Obviates the need to call Add() to add items to collection manually.
Lab
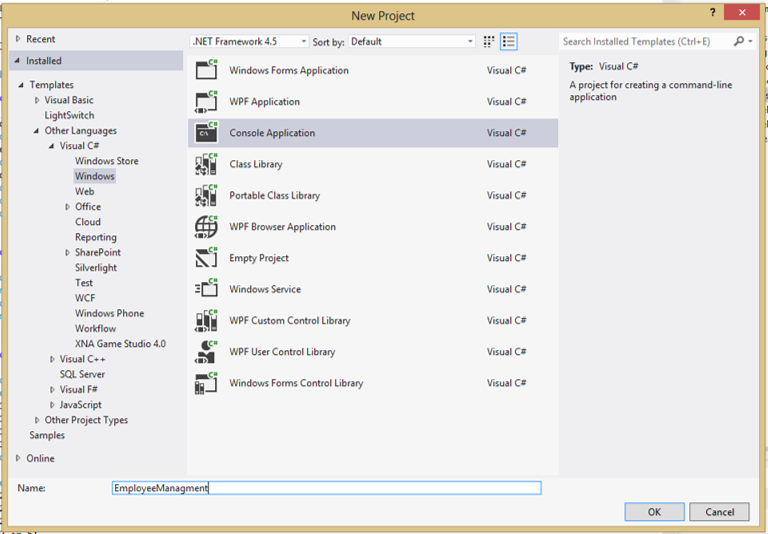
To help demonstrate the use of initializing a collection we will use a solution that has been pre-made that we will then modify to show this in action. This solution will also be used in the next labs; the solution is called BankSystemInitial and can be downloaded from the top of the page.
Once this is opened you should see one solution that contains 4 class files. For this lab we only need to edit program.cs and the method labelled exercise one
What we are going to do is using the BankAccount class to create some new bank accounts. Some normally using object initializer syntax and some using collection initializer syntax – private static void Exercise1Test()
{
...
// Create some objects using object initializer syntax.
BankAccount acc1 = new BankAccount { AccountHolder = "John", Balance = 1000 };
...
// Create a collection using collection initializer syntax.
List<BankAccount> accounts = new List<BankAccount>
{
new BankAccount { AccountHolder = "Huey", Balance = 4000 },
...
};
foreach (BankAccount acc in accounts)
...
}
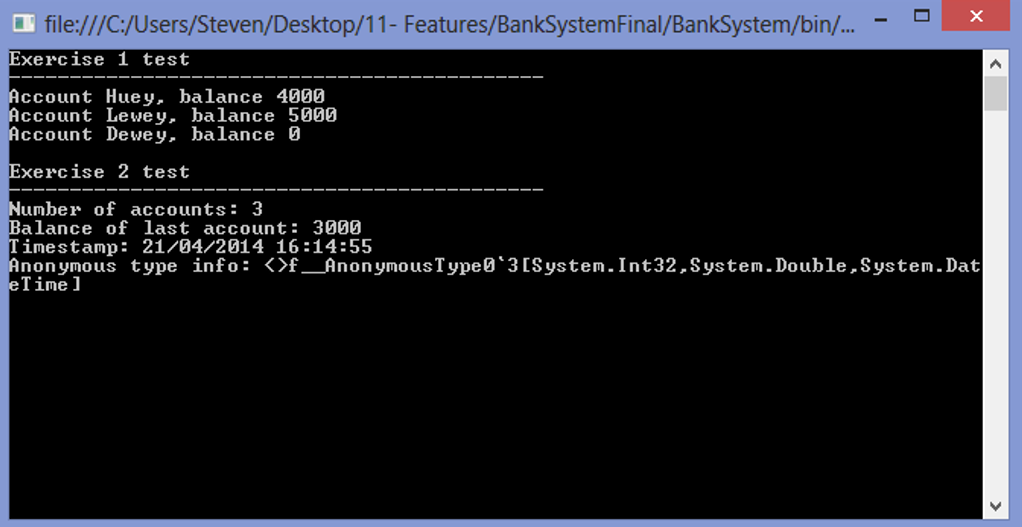
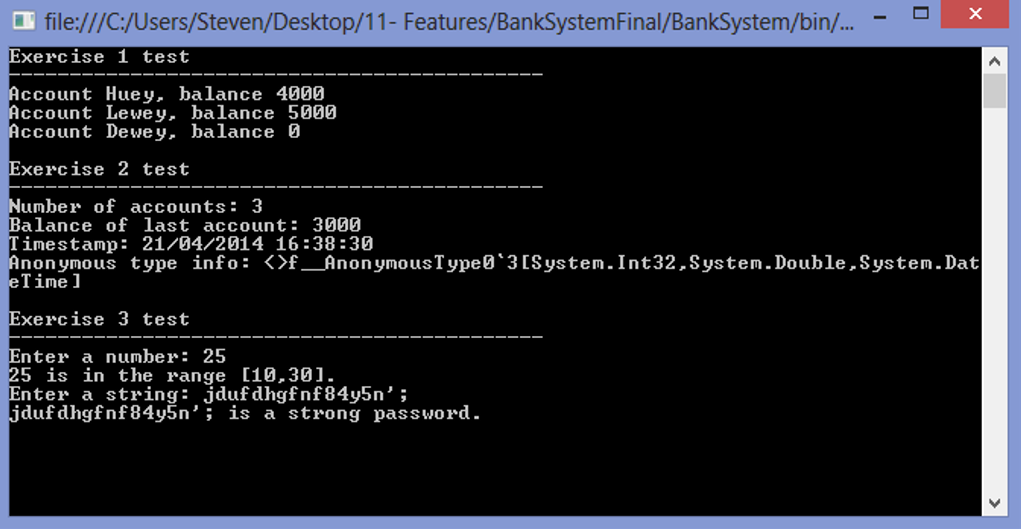
On running the application you should see the following results showing all the accounts in the collection that we made –
Lab 2: Anonymous Types
Lab 2: Anonymous Types
Overview
An anonymous type is a type that has no name:
OK, you could have probably guessed this yourself!
This is how anonymous types work:
Create an object using new, but omit the type name:
Just enclose property setters in {}.
The compiler generates a type name internally.
Assign the object to a var variable:
You must use var, because you don’t know the type name!
Purpose of Anonymous Types:
Anonymous types are primarily used in LINQ (Language Integrated Queries):
See later in course.
In a nutshell:
You can use LINQ to query a data source (such as a collection, or an XML document, or a database).
If you don’t want to see the entire result for each “row” in the result set, you can use an anonymous type.
The anonymous type specifies the subset of data you want back.
Lab
Carrying on from lab one, we will be using the same application and will be editing program.cs but this time we will use exercise two.
we are going to create a bank and fill it with some bank accounts and then we will create an anonymous type that allows us to hold what data we want know about for our bank.
In exercise two add the following code. The main point of the code is to look at the var info and the information that it is holding and how we can access this information through info – private static void Exercise2Test()
{
...
// Create a Bank and add some BankAccounts.
Bank bank = new Bank();
bank[123] = new BankAccount { AccountHolder = "John", Balance = 1000 };
...
// Create an object of anonymous type.
var info = new { NumAccs = bank.NumberOfAccounts, LastAccBalance = bank[789].Balance, Timestamp = DateTime.Now };
// Display values of object of anonymous type.
Console.WriteLine("Number of accounts: {0}", info.NumAccs);
...
}
The end result should look something like this assuming you don’t comment out exercise one. As you can see it is printing all the expected results but what is cool is the getType() method as it is a jumble of different types –
… where the first parameter is prefixed with this.
… to indicate the type of object that it extends.
Client code uses the method seamlessly:
Just like any regular instance method.
Uses of Extension Methods:
Extension methods are primarily used in LINQ:
See later in course.
In a nutshell:
You can use LINQ to query a data source (such as a collection, or an XML document, or a database).
LINQ queries resolve to IEnumerable or similar, which have many new extension methods.
E.g. Where(), First(), Sum(), Average(), etc…
Lab
For this lab we are going to create something a little more substantial compared to the other two. Open the solution we have been working on through the last two labs.
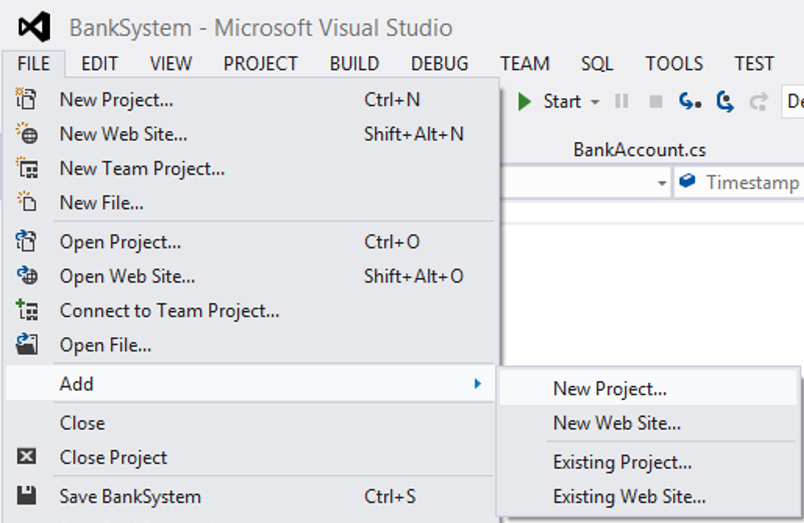
we are going to create some extension methods that could be used by a bank system such as password strength. To start create a new class library by clicking File>Add>New Project and choose Class Library and call this MyExtensionLibrary –
Now in MyExtensionLibrary add a new class called MyExtension and add the following two methods that must be static. First one is a range check that checks to see if a number is in a range of numbers – public static bool InRange(this double number, double min, double max)
{
return number >= min && number <= max;
}
The second method checks to see if a password is strong by seeing if it contains digits and non alphanumeric characters and is over 8 characters – public static bool IsStrongPassword(this string str)
{
if (str.Length < 8)
return false;
...
foreach (char c in str)
{
if (char.IsDigit(c))
...
if (digitFound && nonAlphanumericFound)
return true;
}
// If we get this far, the string is weak password.
return false;
}
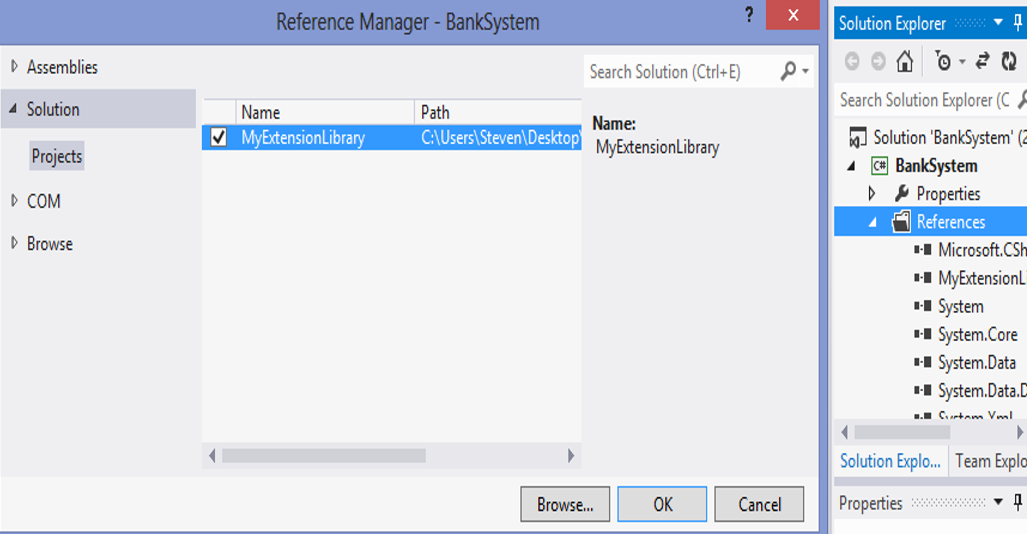
Now to add the client code but first we need to reference this into our BankSystem by right clicking on references in BankSystem Add Reference>Solution and then ticking the MyExtensionLibrary box. Then you just need to add a using statement in program.cs at the top of the page – using MyExtensionLibrary;
The last thing to do is to add our code to exercise three to test this all. It will ask for user input for a number and check this to see if it is on range and then a string and see this as a password in terms of strength – private static void Exercise3Test()
{
...
Console.Write("Enter a number: ");
double num = double.Parse(Console.ReadLine());
if (num.InRange(10, 30))
...
Console.Write("Enter a string: ");
string str = Console.ReadLine();
if (str.IsStrongPassword())
...
}
If you liked this post, please comment with your suggestions to help others.
If you would like to see more content like this in the future, please fill-in our quick survey.
Manage cookie consent
You can view this website without consenting to extra cookies. However you will need to accept the 'marketing' cookies to send messages via the contact forms & see any maps displayed on the site
Functional
Always active
Cookies necessary for the website to work.
Preferences
The technical storage or access is necessary for the legitimate purpose of storing preferences that are not requested by the subscriber or user.
Statistics
The technical storage or access that is used exclusively for statistical purposes.Cookies used to track user interaction on the site, which helps us to evaluate & improve the website.
Marketing: Forms & additional content (Marketing)
We need your permission to place ‘marketing’ cookies, so you are able to use the contact forms & see embedded content e.g. videos and maps. - - - - We have added protection to our contact forms to help prove that a human (rather than a spambot) is filling

If you would like to see more content like this in the future, please fill-in our quick survey.