In this tutorial you will learn more core C# and a look at constructors and parameters. This will allow you to write a simple C# program that you will then compile. The program will be a Visual Studio Form application
About this Tutorial
Objectives
Delegates will learn to develop applications using C# 4.5. After completing this course, delegates will be able to:
Use Visual Studio 2012 effectively
Create commercial C# Web Applications
Develop multi-threaded applications, Use WCF and LINQ
Audience
This course has been designed primarily for programmers new to the .Net development platform. Delegates experience solely in Windows application development or earlier versions of C# will also find the content beneficial.
Prerequisites
No previous experience in C# programming is required. But any experience you do have in programming will help. Also no experience in Visual Studio is required. But again any experience you do have with programming development environments will be a valuable.
Experience using a contemporary OO language such as C++ or C# would be useful but is not required.
Overview
Members are things that are declared inside a class. Members help in representing the class‘s data and behaviour when the application is running. The members that could be inside a class include – fields, constants, properties, constructors, destructors, events, operators etc…
Class members can be specified individually with any one of the following accessibility:
Public – accessible by any code within current or external assembly
Protected – accessibility within the same class or its derived class
Private – accessibility within the same class
internal – accessibility within current assembly
protected internal – accessibility within current assembly or classes derived from containing class
Estimated Time – 1 Hour
Not what you are looking? Try the next tutorial – Going Further with Types and Members
Lab 1: A closer look at parameters
Lab 1: A closer look at parameters
Parameter Passing Modes- Parameters can be out or ref to output values for example: int num1=10, num2=20;
//
MethodIn(num1, num2);
Console.WriteLine("After MethodIn, num1={0}, num2={1}", num1, num2);
//
MethodRef(ref num1, ref num2);
Console.WriteLine("After MethodRef, num1={0}, num2={1}", num1, num2);
//
int prod, quot;
MethodOut(num1, num2, out prod, out quot);
Console.WriteLine("After MethodOut, prod={0}, quot={1}", prod, quot);
//
public void MethodIn(int x, int y)
{ int temp = x; x = y; y = temp; }
...
You can declare a variable-length parameter list and this is done by Defining the final parameter as an array, and prefix it with the params keyword: private static void DisplayThings(string message, params object[] things)
{
Console.WriteLine(message);
foreach (object obj in things)
Console.WriteLine(" {0}", obj);
}
This allows the client to pass a comma-separated list of parameters or an array: DisplayThings("Fav things:",
"Jayne", "Emily", "Tom", 3, ConsoleColor.Red);
DisplayThings("Least fav things:",
new object[] {"Cardiff City", ConsoleColor.Blue});
Optional Parameters- You can define default values for parameters therefore making the parameter optional. This is done by using the equal sign to set a default value: public class Car
{
private string model;
...
public void Accelerate(int delta, bool changeGear = false)
{
if (changeGear)
currentGear++;
currentSpeed += delta;
}
...
}
// AND CALLING THE METHOD
aCar.Accelerate(20); // Equivalent to: aCar.Accelerate(20, false);
aCar.Accelerate(20, true); // Pass in explicit parameter this time.
Named Parameters – Traditionally in C#, methodparameters are resolved positionally e.g. aCar.Accelerate(20, true);
You can now pass named parameters – Use the syntax paramName: paramValue; these are useful if there are lots of optional parameters and you only want to pass some of them e.g. aCar.Accelerate(delta: 20);
aCar.Accelerate(delta: 20, changeGear: true);
aCar.Accelerate(changeGear: true, delta: 20);
Constructors Recap – You can define constructors to initialize objects; A constructor is called when you create an object. A parameter-less constructor is provided for free in every class/struct but you can define any number of constructors – public MyClass(int param1, double param2, ...)
{...}
Initializer Lists – You can use initializer lists in a constructor, to do this add a colon after the constructor header. You can use an ‘initializer list’ to forward to other constructors in the current type this will be done depending on what parameters have been input – : this(param1, param2, ...)
Defining Destructors – You can define a destructor in a class symbolised by “~” at the start of the destructor. The destructor is called when an object is garbage collected known as object finalization as clean-up code is placed in the destructor – ~MyClass() {...}
Lab
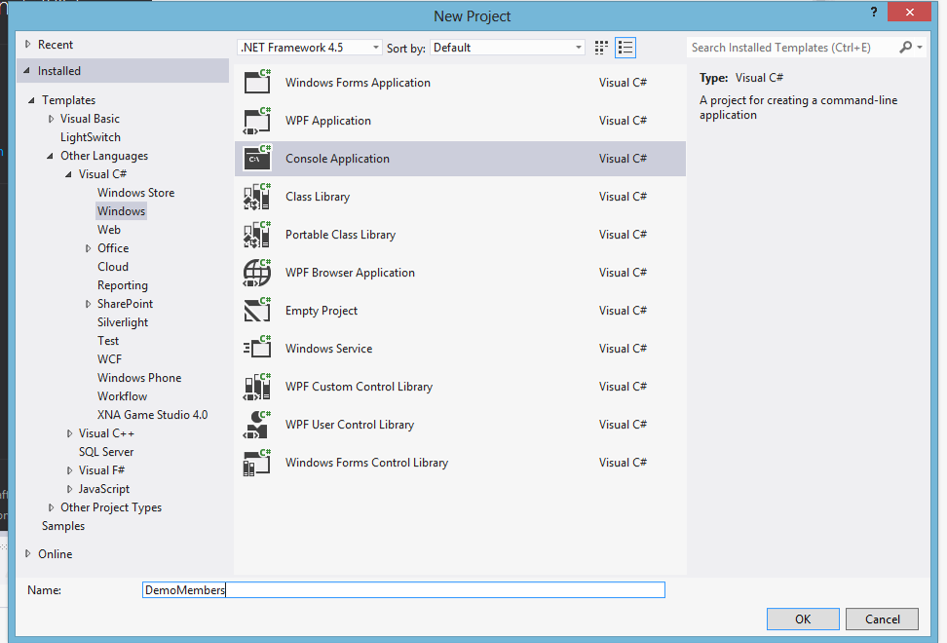
Open up Visual Studio 2013, New Project>C#>Windows>Console Application – What we are going to be making is an investment system that will allow a user to add money to an investment account on years.
Call this application DemoMembers and at the start make sure to add the using statement – using System;
First we are going to set up our data that we are going to hold such as the customers name, an integer to hold the number of years and a double array to hold all investments made. – private string customer;
private int numYears;
private double[] investments;
Next to add is our constructor classes – These work by having a base constructor, if the parameters given match that of either the top two constructors those will be run first before moving onto the bottom constructor (base): public class Investment
{
private string customer;

private int numYears;

private double[] investments;
public Investment(string customer, int numYears, double initialSum)
: this(customer, numYears) // Calls ctor 3.
{
Invest(initialSum, 0);
}
public Investment(string customer, int numYears, params double[] initialSums)
: this(customer, numYears) // Calls ctor 3.
{
foreach (double inv in initialSums)
Invest(inv, 0);
}
public Investment(string customer, int numYears)
{
this.customer = customer;
this.numYears = numYears;
this.investments = new double[numYears];
}
And now we are going to add our destructorclass to finalize anything that was made in the constructors, this is normally things such as closing files, ending connections that were made etc… ~Investment()
{
Console.WriteLine("Inside ~Investment() destructor for {0}.", customer);
Console.WriteLine("Closing investment for {0}", this);
} ...
Now to create the business logic to run behind the scenes; One method will add a value to a given year. The other method will get the value from the sum of all the years investments and one >method to return a string with all the data inside – public void Invest(double amount, int year)
{
if (year < numYears)
{
investments[year] += amount;
}
}
public double CurrentValue
{
get
{
...
}
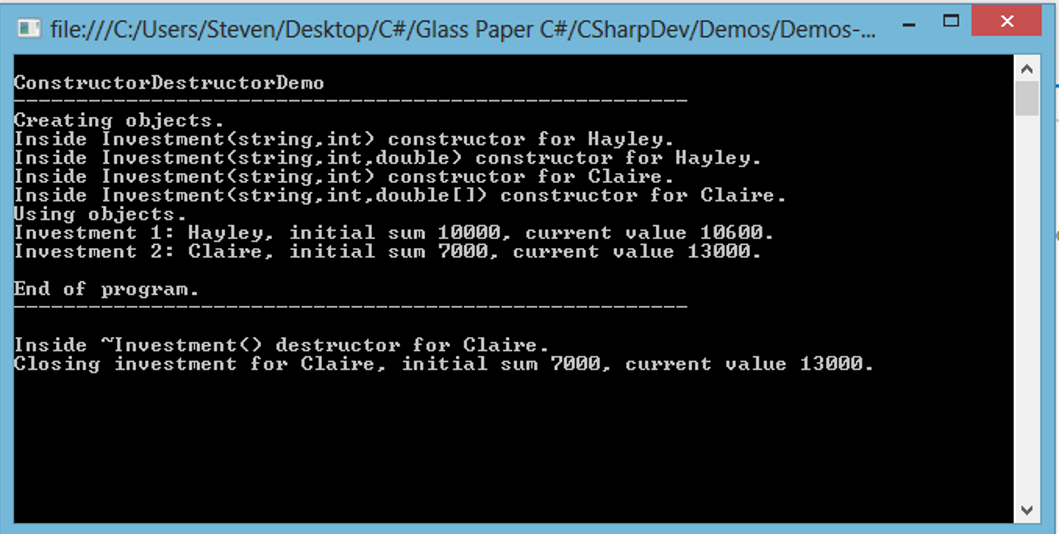
Now running the client code to use our new methods for our banking investments: Console.WriteLine("Creating objects.");
Investment inv1 = new Investment("Hayley", 6, 10000.0);
Investment inv2 = new Investment("Claire", 9, 2000, 4000, 1000);
Console.WriteLine("Using objects.");
inv1.Invest(100, 1);
inv1.Invest(200, 2);
inv1.Invest(300, 3);
Console.WriteLine("Investment 1: {0}", inv1.ToString());
inv2.Invest(1000, 1);
inv2.Invest(2000, 2);
inv2.Invest(3000, 3);
Console.WriteLine("Investment 2: {0}", inv2.ToString());
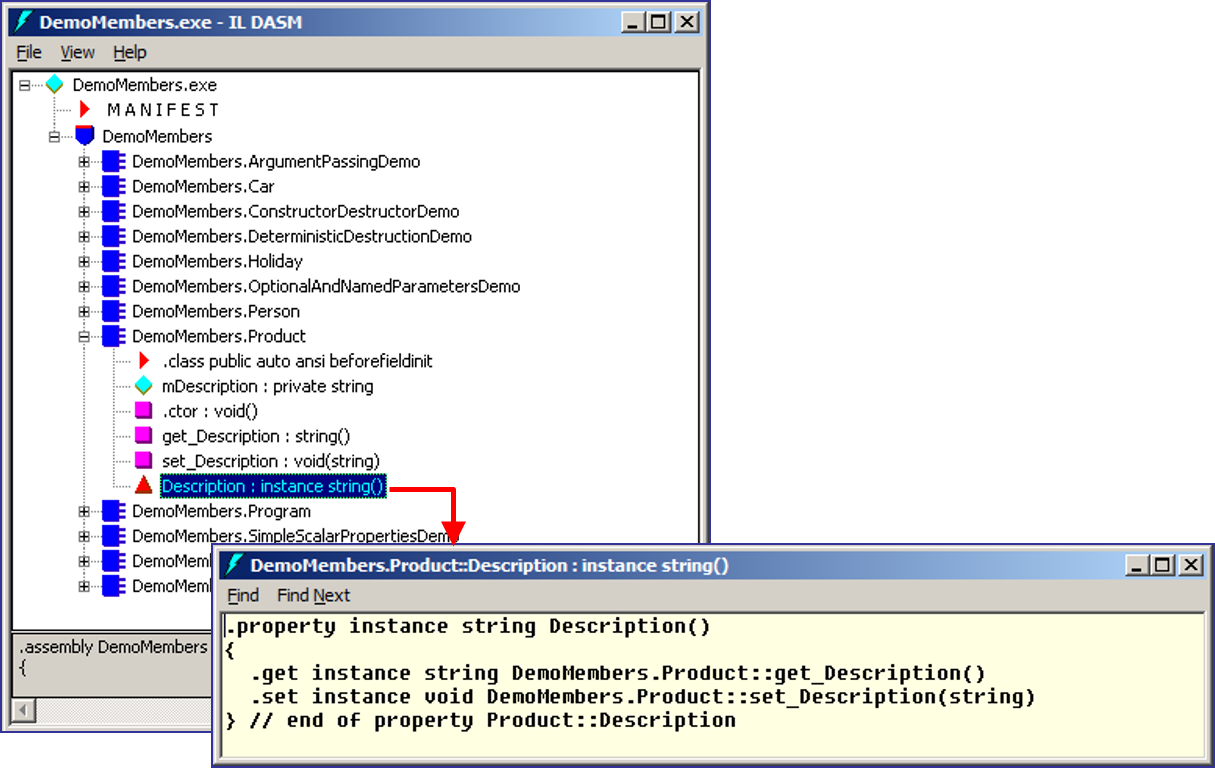
To client they store data associated with the type.
To the class writer, properties are implemented by blocks of code.
Properties can have a ‘getter’ and/or a ‘setter’ – they map to methods in underlying IL code.
There are two kinds – Scalar properties and Indexed properties.
For a scalar property – you get or set a single value by specifying the name and type of the property. Properties are as easy to use as public data, but more encapsulated e.g. make it read-only or write only and maybe perform some validation in the setter – public class Product
{
// Declare a variable to hold the description.
private string mDescription;
// Property to get and set the description.
public string Description
{
get
{
return mDescription;
}
set
{
mDescription = value;
}
}
}
// CLIENT CODE
Product aProduct = new Product(); // Create a Product object
aProduct.Description = "Chef Anton's Gumbo Mix"; // Set Description property.
Console.WriteLine("{0}", aProduct.Description); // Set Description property.
For a write-only property; only provide a “setter”.
Auto-Implemented Properties:
.NET supports of auto-implemented properties – Short-cut syntax for properties that just get/set a value. The compiler automatically generates an appropriate backingfield and implementation for the get set bodies – public class Person
{
public string Name { get; set; }
public DateTime Dob { get; set; }
public string Nationality { get; set; }
...
public Person(string name, DateTime dob, string nationality)
{
Name = name;
Dob = dob;
Nationality = nationality;
}
...
If you want to implement read-only auto-implemented properties: you need to make the setter private e.g. public class Person
{
public DateTime Dob { get; private set; }
...
}
If you liked this post, please comment with your suggestions to help others.
If you would like to see more content like this in the future, please fill-in our quick survey.
Manage cookie consent
You can view this website without consenting to extra cookies. However you will need to accept the 'marketing' cookies to send messages via the contact forms & see any maps displayed on the site
Functional
Always active
Cookies necessary for the website to work.
Preferences
The technical storage or access is necessary for the legitimate purpose of storing preferences that are not requested by the subscriber or user.
Statistics
The technical storage or access that is used exclusively for statistical purposes.Cookies used to track user interaction on the site, which helps us to evaluate & improve the website.
Marketing: Forms & additional content (Marketing)
We need your permission to place ‘marketing’ cookies, so you are able to use the contact forms & see embedded content e.g. videos and maps. - - - - We have added protection to our contact forms to help prove that a human (rather than a spambot) is filling

If you would like to see more content like this in the future, please fill-in our quick survey.