14. Files and Data

About this Tutorial

Objectives

Delegates will learn to develop applications using HTML5/CSS3 and JS. After completing this course, delegates will be able to:

  • Use Visual Studio 2012 effectively
  • Create commercial HTML5 Web Applications
  • Develop Websites that may use web sockets, animations and geolocation

Audience

This course has been designed primarily for programmers new to the .Net development platform. Delegates experience solely in Windows application development or earlier versions of HTML/CSS and JavaScript will also find the content beneficial.

Prerequisites

No previous experience in web programming is required. But any experience you do have in programming will help. Also no experience in browser IDE’s is required. But again any experience you do have with programming development environments will be a valuable.

Download Solutions

HTML tutorial


Overview

Estimated Time – 1 Hour

Not what you are looking? Try the next tutorial – Ajax

  1. HTML5 File API
    • HTML5 has a standardized File API
      • Allows an HTML page to interact with local files
    • File
      • Represents an individual file
      • Read-only properties such as name, file size, and mimetype
    • Blob
      • Allows you to slice a file into byte ranges
      • Handy for incrementally uploading a file to a server
    • FileList
      • An array-like sequence of File objects
      • Obtained via <input type=”file”> or via drag-and-drop
  2. Drag-and-Drop
    • HTML5 supports drag-and-drop
      • You can drag elements on a web page or files in the file system…
      • … and drop them onto a drop-enabled element in the web page
    • Key steps:
      • Enable drag support on HTML source element (optional)
      • Enable drop support on HTML drop target elements
      • Handle drag-and-drop events on the HTML drop target elements
  3. HTML5 Databases
    • HTML5 allows you to store data in a local database
      • Uses Web storage under the covers
    • What can you do?
      • Create and drop tables
      • Query data
      • Insert, update, and delete data

Lab 1: File handling

Lab 1: File handling
  1. Reading File Content
    • HTML5 has a FileReader object, to read file content
      • Reads a text or binary file into memory (asynchronously)
      • You should handle the load and error events
      • You can also handle the progress and abort events
    • FileReader methods for reading a file:
      • result attribute will contain the contents
        of the file
        as a text string
        void readAsText(fileOrBlob, optionalEncoding)
      • result attribute will contain the contents
        of the file as an ArrayBuffer
        void readAsArrayBuffer(fileOrBlob)
      • result attribute will contain the contents
        of the file as raw binary data (DEPRECATED)
        void readAsBinaryString(fileOrBlob)
      • result attribute will contain a data: URL representing the file’s data
        void readAsDataURL(fileOrBlob)
  2. Example – See FileHandling/DemoFileHandling.html. This shows loading text from a file onto the page; the first part declares the elements on the page –
  3. View code file.
  4. <input type="file" id="theTextFile" onchange="onLoadTextFile()" />
    <textArea id="theMessageArea" rows="30" cols="40"></textArea>

  5. This part is the script that does all the back end work by reading the file and then loading the results of this into the textarea
    function onLoadTextFile() {
     var theFileElem = document.getElementById("theTextFile");
     // Get the File object selected by the user (and make sure it's a text file).
     if (theFileElem.files.length != 0 && theFileElem.files[0].type.match(/text.*/)) {
      // Create a FileReader and handle the onload and onerror events.
      var reader = new FileReader();
      reader.onload = function(e){
       var theMessageAreaElem = document.getElementById("theMessageArea");
       theMessageAreaElem.value = e.target.result;
      };
      Error ...
      };
      // Read text file (the 2nd parameter is optional - the default encoding is "UTF-8").
      reader.readAsText(theFileElem.files[0], "ISO-8859-1");
     } else {
      alert("Please select a text file");
     }
    }

Lab 2: Drag-and-drop

Lab 2: Drag-and-drop
  1. Enabling Drag Support on an HTML Element
    • To enable a user to drag an HTML element:
      • Set the element’s draggable attribute to true
      • Handle the dragstart event
    • Implement the dragstart event handler as follows:
      • Configure the dataTransfer attribute on the event object
      • The dataTransfer attribute is a DataTransfer object
  2. DataTransfer Methods and Properties
    • setData(mimeType, data)
      • Specifies MIME type of data being transferred, plus the data itself
    • setDragImage(imgElement, x, y)
      • Sets a custom mouse cursor image during the DnD operation
    • effectAllowed
      • Specifies types of DnD operations allowed
      • E.g. copy, move, or link
    • dropEffect
      • Specifies UI feedback when mouse hovers over a target element
      • Allowed values are none, copy, move, and link
  3. Enabling Drop Support on an HTML Element
    • To enable a user to drop onto an HTML element:
      • Handle the dragover event
      • Handle the drop event
    • Implement the dragover event handler as follows:
      • Call preventDefault() on the event argument, to prevent default drag-over behavior
    • Implement the drop event handler as follows:
      • Call dataTransfer.getData() on the event argument, to get the data being dropped
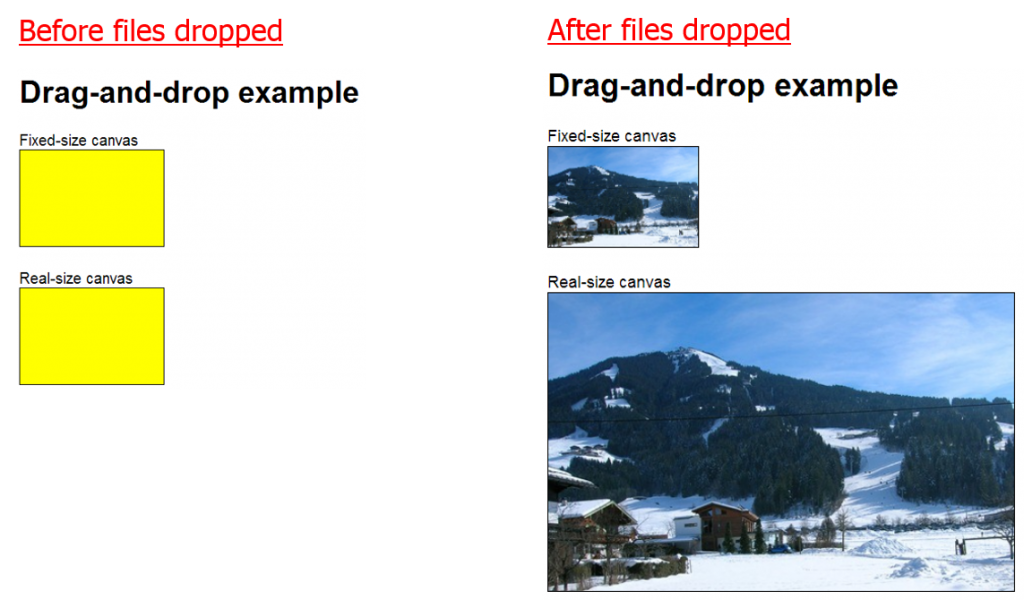
  4. Example – See DragAndDrop/DragDropFile.html
  5. View code file.
  6. T14P1

Lab 3: Using HTML5 databases

Lab 3: Using HTML5 databases
  1. Opening a Database
    • To open a database:
      • Call window.openDatabase()
    • Specify the following parameters:
      • Name of database
      • Version number
      • Text description
      • Estimated size of database
    • Example:
      if (window.openDatabase) {
       var db = window.openDatabase("myDB",
                      "1.0",
                      "My database containing info about whatever",
                      1024*1000);
       ...
  2. Executing SQL Statements:
    • To execute statements:
      • Call transaction() on your database object
      • Pass in a function to execute the statement asynchronously
    • The function receives a transaction object
      • Call its executeSql() method to execute a SQL statement in the transaction
    • Example:
      db.transaction(function(tx) {
       tx.executeSql("CREATE TABLE IF NOT EXISTS " +
              "Courses(id INTEGER PRIMARY KEY, name TEXT, duration INTEGER)", []);
      });
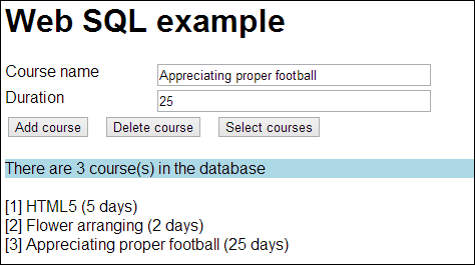
  3. Example of HTML5 databasesDatabases/WebSql.html
  4. View code file.
  5. T14P2


Well done. You have completed the tutorial in the HTML5/CSS3/JS course. The next tutorial is

15. Ajax


Back to beginning
Copyright © 2016 TalkIT®


If you liked this post, please comment with your suggestions to help others.
If you would like to see more content like this in the future, please fill-in our quick survey.
Scroll to Top