13. Web Storage

About this Tutorial

Objectives

Delegates will learn to develop applications using HTML5/CSS3 and JS. After completing this course, delegates will be able to:

  • Use Visual Studio 2012 effectively
  • Create commercial HTML5 Web Applications
  • Develop Websites that may use web sockets, animations and geolocation

Audience

This course has been designed primarily for programmers new to the .Net development platform. Delegates experience solely in Windows application development or earlier versions of HTML/CSS and JavaScript will also find the content beneficial.

Prerequisites

No previous experience in web programming is required. But any experience you do have in programming will help. Also no experience in browser IDE’s is required. But again any experience you do have with programming development environments will be a valuable.

Download Solutions

HTML tutorial


Overview

Estimated Time – 1 Hour

Not what you are looking? Try the next tutorial – Files and Data

  1. Recap of Cookies
    • HTML5 Web Storage is a successor to cookies
      • So it makes sense to discuss cookies first
    • Cookies are a well-established way to exchange small pieces of data between client and server
      • Can be persisted (for a specified lifetime) on client’s computer
      • Typically used to store user ID, etc.
      • Have a scope (domain, application, page)
    • Limitations of cookies
      • Very limited in size (~4KB per cookie)
      • Transmitted back-and-fore on every request scoped for that cookie
  2. The HTML5 Web Storage Approach
    • In many cases where cookies are used traditionally, the same effect could be achieved without using a network
    • This is where the HTML5 Web Storage API comes in …
      • Developers can use the HTML5 Web Storage API to store values in local JavaScript objects
      • The objects persist across page loads
    • Additional notes:
      • Stored data is not transmitted across the network
      • Very large values can be stored (e.g. ~MB)
  3. Categories of Web Storage
    • Local storage
      • Accessible via window.localStorage
      • Values are persisted even after you close the browser window
      • To remove items from local storage, you must do so explicitly via JavaScript code (or if the user clears the browser’s cache)
      • Values are accessible from the domain that initially stored the data
    • Session storage
      • Accessible via window.sessionStorage
      • Values are discarded when the browser or tab is closed
      • Values are accessible only from the page that stored the data
  4. Checking for Support
    • You can easily check for Web Storage support – See TestWebStorageSupport.html
    • View code file.
    • <script>
      ...
      var localStorageMessageArea = document.getElementById("localStorageMessageArea");
      var sessionStorageMessageArea = document.getElementById("sessionStorageMessageArea");
      if (window.localStorage) {
       localStorageMessageArea.innerHTML = "Browser DOES support localStorage";
      } else {
       localStorageMessageArea.innerHTML = "Browser DOES NOT support localStorage";
      }
      if (window.sessionStorage) {
       sessionStorageMessageArea.innerHTML = "Browser DOES support sessionStorage";
      } else {
       sessionStorageMessageArea.innerHTML = "Browser DOES NOT support sessionStorage";
      }
      ...
      </script>

Lab 1: Understanding the Web Storage API

Lab 1: Understanding the Web Storage API
  1. Overview
    • sessionStorage and localStorage offer exactly the same APIs
    • We’ll show how to use the capabilities of the Storage interface
      • The example would be syntactically the same, whichever category of storage we chose to use
  2. Getting and Setting a Value
    • There are several ways to get a value from web storage
      • E.g. to get an item named “count” from local storage:
        var i = window.localStorage.count;
        var i = window.localStorage.getItem("count");
        var i = window.localStorage["count"];
    • There are several ways to store a value in web storage –
      • E.g. to store an item named “count” in local storage:
        window.localStorage.count = i;
        window.localStorage.setItem("count", i);
        window.localStorage["count"] = i;
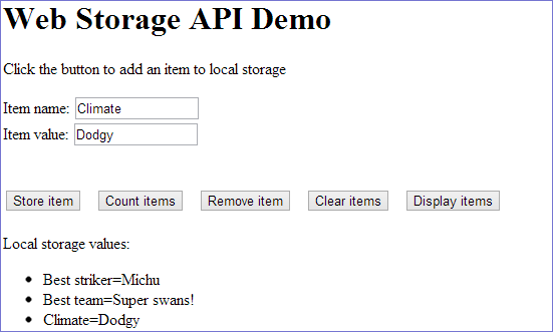
    • Example – See AccessingWebStorage.html
    • View code file.
  3. Obtaining a Count of Items
    • You can get the number of items in web storage
      • E.g. to get the count of items in local storage:
        var count = localStorage.length;
  4. Removing Items
    • You can remove a particular item from web storage
      • E.g. to remove an item named “count” from local storage:
        localStorage.removeItem("count");
    • You can clear all items in web storage
      • E.g. to clear all items from local storage:
        localStorage.clear();
  5. Iterating all Items
    • You can iterate through all the items in web storage
      • Iterate over the keys, and get the value for each key
      • E.g. to iterate over all the items in local storage:
        var count = localStorage.length;
        for (var i = 0; i < count; i++) {
         var key = localStorage.key(i);
         var val = localStorage[key];
         alert(key + "=" + val);
        }
  6. Worked Example:
    • For a worked example, see the complete code in the following file:
Lab
  1. In this lab, you’ll implement shopping cart functionality using Web storage at the client.
  2. You will be working through the solutions in the initial folder with the completed work in the final folder so that you are able to refer back to them if you run into issues.
  3. Implementing basic Web storage
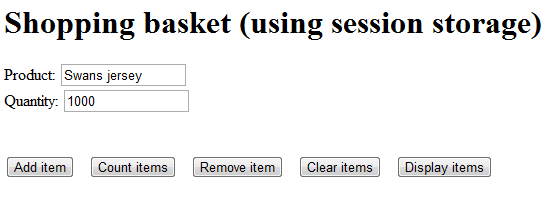
    • In the initial folder, open ShoppingBasket.html in the browser. The Web page appears as follows:
    • View code file.
    • T13P4

    • Open the Web page in an editor and implement the Add item button. This will allow the user to add a specified product and quantity to the shopping cart (use the product name as a key in session storage, and use the quantity as the corresponding value).
      var product = document.getElementById("product").value;
      var quantity = document.getElementById("quantity").value;
      window.sessionStorage.setItem(product, quantity);
      alert("Done");

Lab 2: Listening for storage events

Lab 2: Listening for storage events
  1. Overview
    • The data stored in local storage is available to any document that has the same origin
    • The storage event is triggered when one document makes a change to the storage
      • We can listen to this event in other documents that were loaded from the same origin
      • Allows documents to stay abreast of changes
  2. Handling Storage Events
    • This is how you handle the storage event for local storage:
      window.onstorage = handleStorage;
      function handleStorage(eventStorage) {
       // eventStorage parameter gives information about the change in storage...
      }

      • Properties on the eventStorage object:
        • key – indicates the key that’s changed
        • oldValue – old value for key (may be null)
        • newValue – new value for key (may be null)
        • url – URL of the document that made the change
        • storageArea – local/session storage object that’s changed
  3. Worked Example for Local Storage
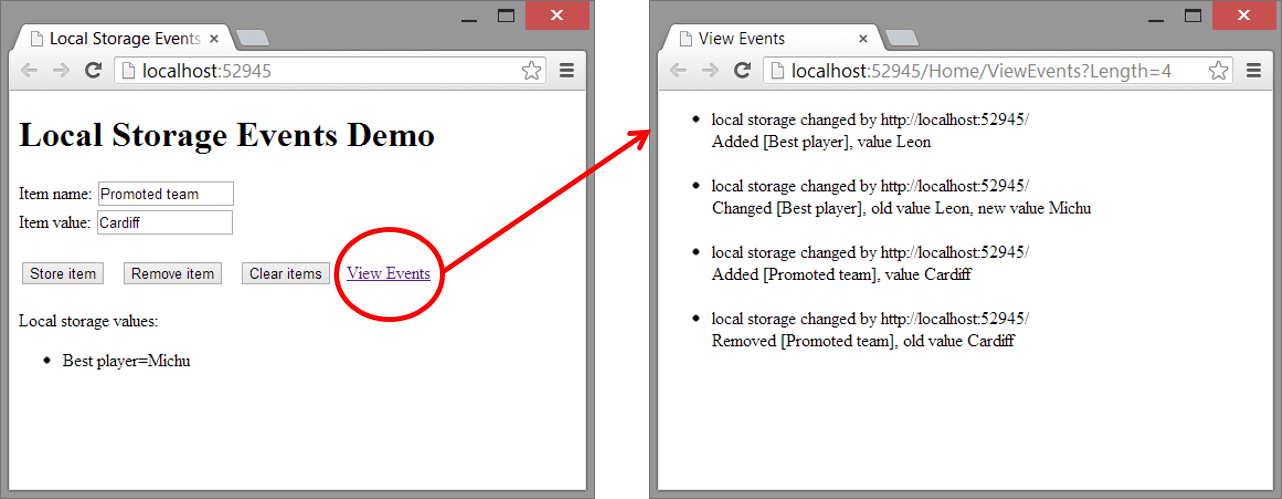
    • For an example of storage events for local storage, see the StorageEvents demo
    • Similar idea for session storage (within a browser session)
Lab
  1. Enhancing the application functionality
    • Add the following features to the Web page:
      • Display a count of items in the shopping cart
        var count = window.sessionStorage.length;
        alert("There are " + count + " item(s) in your basket");
      • Remove a particular item from the shopping cart
        var product = document.getElementById("product").value;
        window.sessionStorage.removeItem(product);
        alert("Done");
      • Clear all items from the shopping cart
        window.sessionStorage.clear();
        alert("Done");
      • Display all items in the shopping cart
        var count = window.sessionStorage.length;
        var result = "Shopping basket:<br/><ul>";
        for (var i = 0; i < count; i++) {  var key = window.sessionStorage.key(i);  var val = window.sessionStorage.getItem(key);  result += "<li>" + key + " [" + val + "]</li>"; } result += "</ul>"; document.getElementById("messageArea").innerHTML = result;

Lab 3: Offline working

Lab 3: Offline working
  1. Overview of Offline Working
    • Many of the design goals of HTML5 are driven by advances in mobile technology
      • E.g. smart phones and tablets
      • But these devices have unreliable connectivity to the Internet.
    • With this in mind, HTML5 allows a Web page to specify all of its requirements up-front
      • Allows the device to preload all content that might be needed later in the browsing session
      • ... in case there isn't an Internet connection later
  2. Defining an Application Cache
    • To benefit from offline working, you must define an application cache file
      • .appcache file extension
    • Example: OfflineWorking/countries.appcache
      CACHE MANIFEST
      # URIs for the device to download and cache for offline use...
      CACHE:
      Default.png
      Fallback.png
      Brazil.png
      China.png
      Greece.png
      Norway.png
      # Fallback rules (what to do if user selects a non-cached file)...
      FALLBACK:
      / Fallback.png
      # Network files (only available when online)...
      NETWORK:
      *
  3. Using the Application Cache in a Web Page
    • For a Web page to use the application cache:
      • In the <html> tag, set the manifest attribute to the name of the application cache file
      • Example: OfflineWorking/OnOfflineApp.html
      • View code file.
      • <html manifest="countries.appcache">
         ...
        </html>

  4. Using the Application Cache in JavaScript Code
    • You can access the application cache in JavaScript code
      • Via the window.applicationCache property
    • Useful methods:
      • update() - initiates a check for updates
      • swapCache() - incorporate newly available objects into cache
    • Useful events:
      • cached - application cache is ready and available for use
      • updateready - new version of cached objects downloaded
    • Useful properties:
      • status - 4 means cache has been updated with new resources
  5. Determining Online/Offline Status
    • You can determine if you are currently online
      • Via the navigator.onLine property
    • There are 2 window events that indicate a transition from online to offline status, or vice versa
      • offline - Triggered when the application goes offline
      • online - Triggered when the application comes online again
  6. Page Visibility
    • The Page Visibility API allows you to determine if a Web page is currently visible
      • If it's not visible, you can stop doing some background tasks (to save processor time and to reduce power consumption)
    • To determine if the current page is visible or hidden:
    • To be notified when the visibility changes:
      • Handle the visibilitychange event
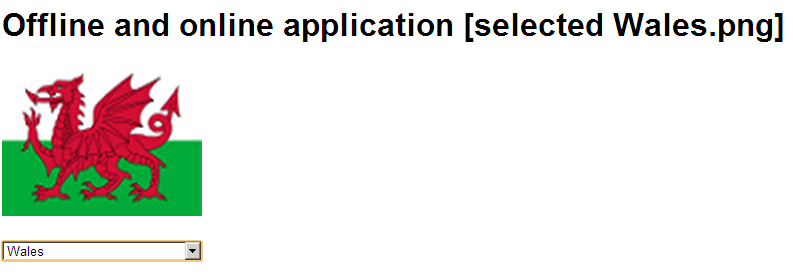
  7. Example of offline storage - See OfflineWorking/OnOfflineApp.html
  8. View code file.
  9. T13P3


Well done. You have completed the tutorial in the HTML5/CSS3/JS course. The next tutorial is

14. Files and Data


Back to beginning
Copyright © 2016 TalkIT®


If you liked this post, please comment with your suggestions to help others.
If you would like to see more content like this in the future, please fill-in our quick survey.
Scroll to Top